Maximize Your Roof Damage Claim Approval After Storms
Roof Damage Claims: Get Faster Approval and the Full Payout You Deserve

Roof damage claims move quickly and require clear evidence, accurate inspection, and focused negotiation to get approved and fully paid. This guide walks homeowners through the roof damage types that trigger claims, why insurers sometimes deny or underpay, and the practical steps to take after a storm to protect coverage and strengthen your claim. You’ll learn what evidence matters, how to document damage for insurers, and proven tactics to avoid underpayment or denial while repairs are scheduled. We also explain how licensed public adjusters and vetted contractors work together to reduce delays, uncover missed damage, and improve settlements. Throughout, you’ll find checklists and clear action items you can use right after a loss.
Common Roof Damage Types That Trigger Insurance Claims
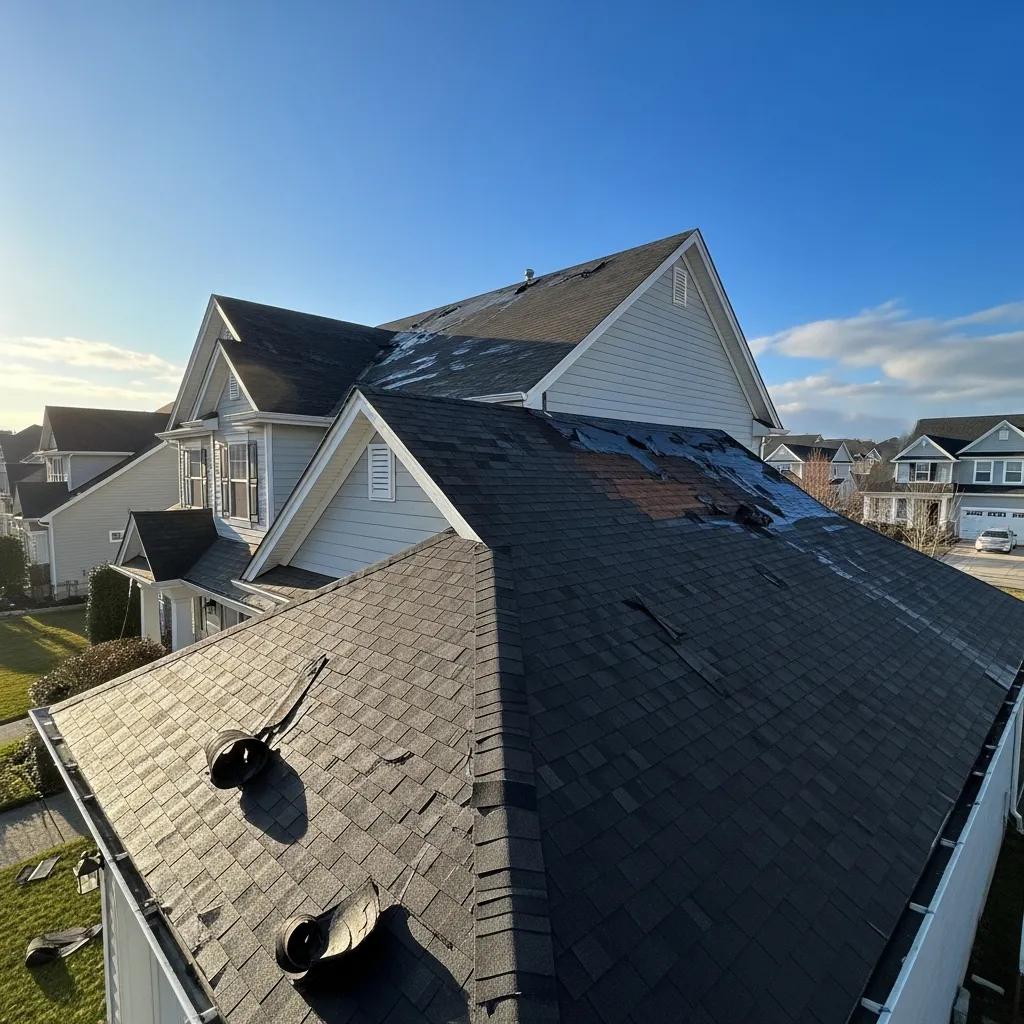
Roof damage that leads to insurance claims can be sudden—like wind, hail, or fire—or progressive, such as water intrusion and age-related failure. Identifying the damage mechanism—impact, uplift, penetration, or deterioration—helps determine whether the loss is a covered peril and guides the right evidence to collect. Below are the most common claim-triggering roof problems, how they look, and why they matter for coverage and payout.
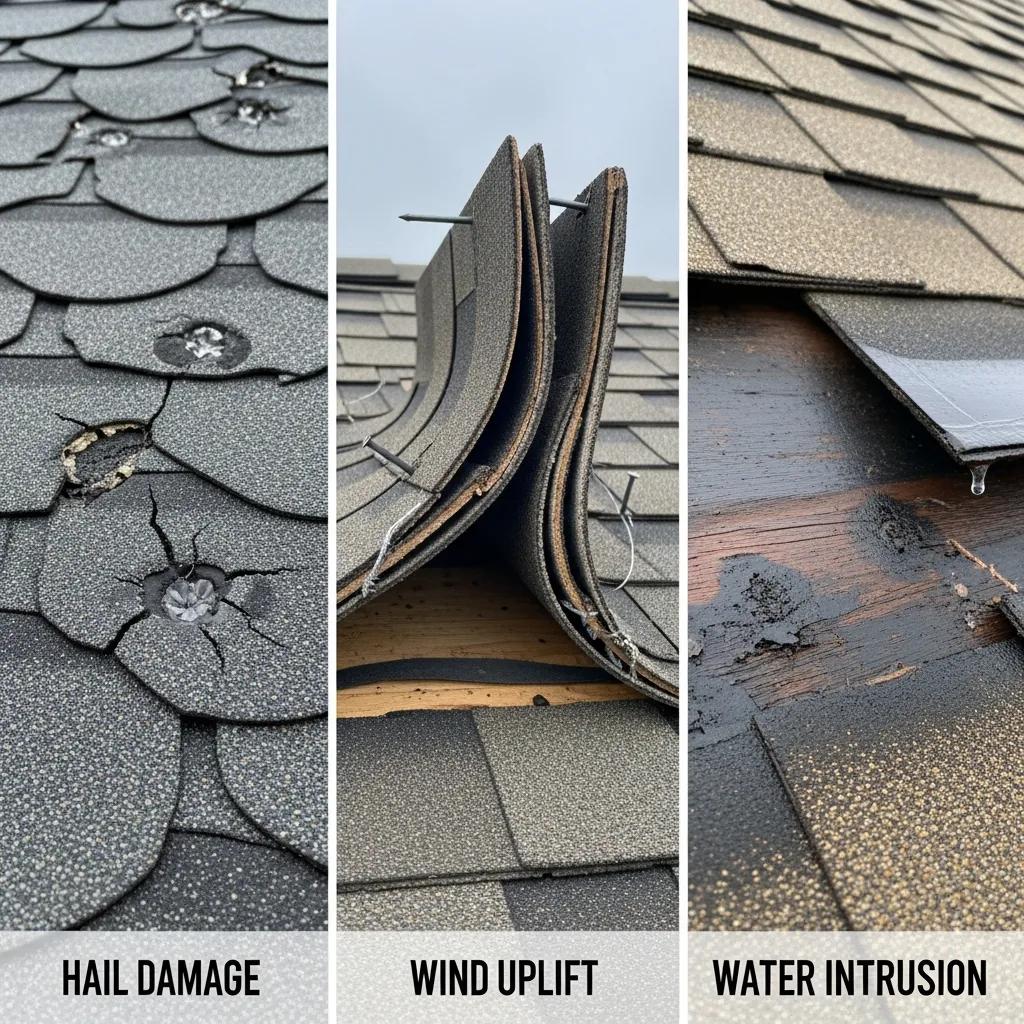
- Storm and wind damage: Missing or lifted shingles, displaced ridge caps, or visible flapping usually point to wind uplift and are commonly covered.
- Hail damage: Dented metal, bruised shingle surfaces, or fractured granules indicate impact damage that insurers will inspect closely.
- Water intrusion and leaks: Brown ceiling stains, sagging drywall, or steady drips are signs of a breach often linked to roof failure.
- Fire-related damage: Charring, melted components, and scorched structure create immediate safety and coverage concerns.
- Tree impact and punctures: Localized holes, broken decking, or displaced flashing point to direct physical damage from falling limbs or debris.
- Wear and age deterioration: Widespread granule loss, brittle materials, and general decay are typically treated as maintenance issues and may be excluded.
Spotting these categories early helps you collect targeted evidence and prioritize urgent mitigation. The next sections explain how each peril usually appears on inspection and what interior signs to look for.
How Storms, Hail, Wind and Fire Damage Roofs
Wind and storms damage roofs by lifting edges, breaking shingles, and allowing wind-driven rain to get beneath roofing materials. Hail produces concentrated impact marks—dents in metal, fractured or missing shingle granules, and soft spots that often need close-up photos and tactile checks to document. Fire harms roofing with heat, charring, and melted components that can compromise structure and demand fast documentation for safety and coverage. Inspectors look for mechanism-specific clues—lifted sealant lines for uplift, circular impact marks for hail, or scorch patterns for fire—that change how an insurer assigns cause and scope. Recognizing these signs helps you focus photo documentation and prioritize measures that prevent secondary damage.
Knowing how hail shows up on a roof helps you and your adjuster accurately assess claim severity and pursue the right compensation.
Analyzing Hail Damage and Claim Severity
Analysis of 2015 property-claims data comparing roof claim severity normalized by Coverage A limits for policies with and without roof claims.
Signs of Water, Mold and Structural Roof Damage
Water intrusion usually starts with interior signs: discolored ceilings, brown stains, bubbling paint, or a musty smell. Outside, look for missing flashing, clogged valleys, or visible roof pooling. Persistent leaks lead to mold and rot—black or green staining, soft or sagging decking, and compromised attic insulation—that signal longer-term structural risk. Structural damage shows as sagging rooflines, cracked rafters, or misaligned planes and needs prompt professional review to avoid collapse and growing insurance exposure. Time-stamped photos of both interior and exterior signs, plus notes on when and where moisture appeared, help link interior damage to an exterior cause. Because mold and rot affect habitability and health, document remediation costs and temporary repairs to capture the full claim scope.
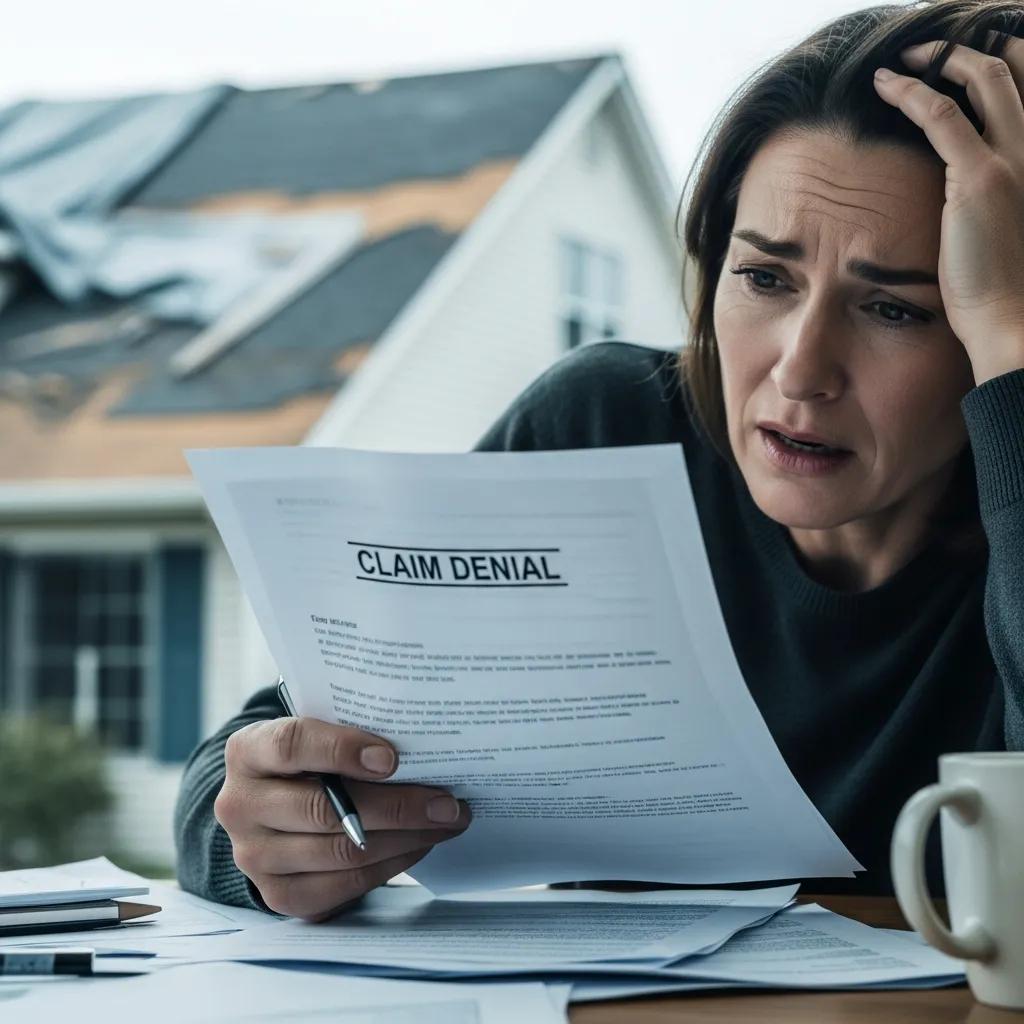
Why Roof Damage Claims Get Denied or Underpaid
Insurers deny or underpay roof claims for predictable reasons: late reporting, weak documentation, classification as wear-and-tear, and policy limits or exclusions. Each denial reason points to a specific homeowner action—prompt notice, strong photographic evidence, professional estimates, and clear causation—that reduces the chance of denial and improves settlement results. Below are the most common denial or underpayment causes with short remedies you can use right away.
- Late reporting: Insurers expect prompt notice; file immediately and preserve timestamps.
- Poor documentation: Blurry or missing photos lead to disputes; take clear, time-stamped photos and videos of all damage areas.
- Wear-and-tear exclusions: Carriers may call damage maintenance-related; provide contractor records and prior-condition proof.
- Incomplete scope: Missed secondary damage causes underpayment; get a thorough inspection and a line-item estimate.
- Low initial adjuster estimate: Field adjusters sometimes undervalue losses; collect competitive estimates and consider a public adjuster.
Addressing these remedies quickly narrows dispute windows and strengthens negotiation leverage. The following sections unpack common denial rationales and practical prevention tactics.
Most Common Reasons Insurers Deny Claims
Carriers often deny claims when the cause is excluded under the policy or when they conclude damage stems from pre-existing wear and tear instead of a covered event. Other frequent reasons include missed notice deadlines, failure to mitigate further damage after the event, and insufficient evidence linking the event to the loss. For example, an insurer may deny a water intrusion claim if there’s no contemporaneous weather record or if the roof’s age suggests depreciation. Homeowners reduce these risks by keeping maintenance records, filing notice immediately after an event, and documenting the roof before and after storms. Those steps build a clearer chain of causation and limit the insurer’s grounds for denial.
How to Avoid Underpayment on Your Roof Claim
To avoid underpayment, combine quick, thorough documentation with detailed cost estimates and expert advocacy. First, take high-resolution, time-stamped photos and videos of exterior and interior damage and keep receipts for temporary repairs—this evidence forms valuation’s foundation. Second, get detailed line-item estimates from vetted roofing contractors that separate materials, labor, and scope. Third, consider hiring a licensed public adjuster to prepare a professional damage report and negotiate with the insurer. Together, these steps create a defensible valuation that cuts insurer leverage and often leads to higher settlements than homeowner estimates alone. Solid documentation and third-party validation are the best defenses against undervaluation.
Smart negotiation tactics make a big difference when you’re dealing with insurance adjusters—prepare your evidence and your strategy.
Insurance Claim Negotiation Strategies
Comparing negotiations handled directly with a claimant to negotiations led by claims adjusters provides insight into settlement techniques and risks.
How Adjustering Speeds Roof Damage Claim Approval
Adjustering connects homeowners and business owners with licensed public adjusters and vetted roofing, siding, and restoration contractors to streamline inspections, documentation, and repairs. That coordination shortens delays and helps capture the full scope of damage. Fast access to local experts means inspections happen sooner, evidence is gathered correctly, and line-item estimates are prepared by contractors who know insurers’ documentation expectations. Adjustering provides this client coordination as a free service to reduce confusion during stressful claims processes and ensure no damage is missed at the initial assessment. The sections below describe the coordinated workflow and the measurable benefit of quick local expertise for claim outcomes.
| Role | Responsibility | Benefit |
|---|---|---|
| Public Adjuster | Inspect damage, prepare claims documentation, negotiate with the insurer | Maximizes payout and ensures accurate valuation |
| Roofing Contractor | Provide detailed, line-item repair estimates and scope of work | Creates credible cost evidence and realistic timelines |
| Homeowner | Provide access, incident details, and temporary repair receipts | Ensures the claim is supported and mitigation is documented |
The Coordinated Process Between Public Adjusters and Contractors
The coordinated process starts with a rapid inspection by a licensed public adjuster who documents damage and produces a professional damage report with photos and an initial scope. That report is used to commission detailed, line-item contractor estimates that map repairs to insurer line items and create a defensible valuation for negotiation. The public adjuster then presents the combined package—photographic evidence, the official report, and contractor scopes—to the insurer and negotiates settlement while the contractor prepares to mobilize after approval. This workflow aligns technical documentation with repair scope and lowers the risk that insurers will miss or undervalue important items. Faster coordination shortens the time between event and settlement and reduces repair delays.
Why Fast Access to Local Experts Improves Outcomes
Local experts deliver quicker inspections, region-specific storm knowledge, and repair estimates insurers accept as credible. Rapid inspections shrink the window for secondary damage that complicates claims, and local contractors can document common regional failure patterns—like local wind or hail signatures—more convincingly. Vetted partners also mobilize faster for temporary protection and permanent repairs, preserving property value and adding documentation to the claim file. Because insurers weigh timely and credible evidence heavily, local expertise often translates into stronger settlements and fewer disputes. If you need licensed adjusters and vetted contractors in Philadelphia, Bucks, Montgomery, Chester, Delaware counties or parts of New Jersey, Adjustering can connect you quickly to qualified local professionals.
Step-by-Step Actions to Take After Roof Damage
After roof damage, follow a short, prioritized checklist to protect safety, preserve evidence, and start the claims process. These steps reduce risk, support coverage, and speed approval. The five-step checklist below covers what to do in the first 72 hours after storm or impact damage.
- Ensure safety and assess hazards: evacuate if there’s electrical risk or structural instability; only do safe, ground-level checks.
- Mitigate further damage: install temporary protection like tarps or board-up services and save all receipts for emergency repairs.
- Document thoroughly: take time-stamped photos and videos of exterior and interior damage from multiple angles.
- Notify your insurer immediately: file a notice of loss per your policy and record the claim number and adjuster contact information.
- Contact a licensed public adjuster or a claims coordination service: arrange a professional inspection and line-item estimates.
Following these steps preserves coverage, strengthens your evidence, and prepares you for efficient negotiation. The next section covers immediate actions in more detail and how Adjustering can connect you with licensed professionals.
| Emergency Action | Why it's needed | Example / Receipt to Keep |
|---|---|---|
| Temporary tarp | Stops water intrusion and prevents secondary damage | Invoice or photo showing tarp installation |
| Board-up | Secures openings and protects against theft and weather | Contractor receipt with date/time |
| Water extraction | Removes standing water that leads to mold | Service ticket from restoration provider |
| Photographic log | Time-stamped proof of the condition | Photos and video files with timestamps |
Keep receipts and photos for every emergency action—insurers commonly reimburse reasonable mitigation when it’s properly documented. Organize those records for submission with your claim.
What to Do Immediately After Roof Damage
Start by protecting occupants and securing the site: check for live electrical hazards, move people away from unsafe areas, and only do visual checks from the ground. Once it’s safe, take time-stamped, high-resolution photos and videos of roof fields, edges, penetrations, and any interior leaks to create a clear before-and-after record. Apply temporary protections—tarps or board-up—only when it’s safe and keep invoices and photos of the temporary work; these are often reimbursable. Open a claim with your insurer and note the claim number, then contact a licensed public adjuster or claims coordination service for a professional inspection. If you need help finding licensed adjusters and vetted contractors in your area, Adjustering offers a free client service to connect you quickly to local experts who can inspect and document damage thoroughly.
How Expert Inspection and Documentation Are Conducted
Expert inspections follow a consistent protocol: the inspector documents roof fields, penetrations, flashing, attic conditions, and interior damage using measurement tools, close-up photography, and moisture meters when needed. Inspectors deliver a formal report that includes a damage scope, recommended repairs, and photos mapped to repair line items—this report is central to negotiations. Photographic protocols require multiple angles, scale references, and time-stamped captures to remove ambiguity and link exterior damage to interior effects. Typical deliverables include the inspection report, a detailed contractor estimate, and a suggested claim valuation—together these form a defensible submission for the insurer. Clear, methodical documentation increases the chance of faster approval and a fuller settlement.
High-quality photos aren’t just documentation—they’re essential evidence that supports your claim and prevents disputes.
Using Photography to Support Insurance Claims
Photographs—both aerial and ground-level—help verify claim details and provide critical evidence when insurers review damage. (PM Gilmour, 2019)
How to Maximize Your Roof Damage Insurance Payout
Maximizing your payout rests on three priorities: hire an advocate (a licensed public adjuster), document everything with professional estimates, and escalate quickly if the insurer undervalues the loss. These steps turn homeowner observations into industry-standard evidence and expert valuation, increasing settlement leverage. Below are the most effective actions for securing a higher payout and why they work.
- Hire a licensed public adjuster: An adjuster advocates for you, prepares technical reports, and negotiates with the insurer to pursue full compensation.
- Compile complete documentation: Time-stamped photos, mapped interior/exterior damage, and temporary repair receipts establish causation and support higher valuations.
- Get multiple line-item estimates: Competitive contractor bids provide a market-validated cost basis and reduce insurer leverage to underpay.
- Keep maintenance records: Proof of regular upkeep can counter carrier claims of neglect and protect coverage.
Putting this packet together and presenting it with professional inspection reports significantly increases the likelihood of a full payout. If you want help assembling these materials or connecting with licensed public adjusters and vetted roofing contractors in Philadelphia, Bucks, Montgomery, Chester, Delaware counties or New Jersey, Adjustering offers free referrals and claim coordination. Get your free roof claim review by contacting Adjustering by phone or email for a quick assessment.
What a Licensed Public Adjuster Does for Your Claim
A licensed public adjuster is your advocate: they inspect damage, prepare detailed claims documentation, and negotiate with the insurer to pursue the maximum payout allowed under your policy. Adjusters translate technical findings into line-item estimates and challenge insurer reductions or misclassifications with professional evidence and precedent. Their duties include preparing the claim package, handling communications with the insurer’s adjuster, and managing appeals or supplemental submissions when needed. For homeowners, that typically means less stress, faster claim progression, and often a materially higher settlement than the insurer’s first offer. A public adjuster turns technical and contractual disputes into a managed negotiation on your behalf.
Key Documents You Need for a Roof Damage Claim
Essential documents include time-stamped photos and videos, contractor line-item estimates, your insurance policy declarations page, temporary repair receipts, and prior maintenance records that show the roof’s condition before the event. Each item has a purpose: photos prove condition, estimates set value, policy pages define coverage, and receipts prove mitigation. Organize these documents into a packet that maps photos to repair line items and includes a clear event timeline—this helps insurers and reviewers quickly see cause, scope, and cost. Having a complete packet ready reduces back-and-forth and strengthens your position when seeking full compensation.
What to Do If Your Roof Damage Claim Is Denied
If your claim is denied, request the insurer’s denial letter and reason, gather any missing documentation, and decide whether an appeal or expert intervention is needed. Denial letters usually cite exclusions or missing proofs; knowing the exact reason lets you target the evidence that can overturn the decision. The sequence below outlines a practical appeal process and when to escalate to a public adjuster or attorney.
- Request and review the insurer’s denial letter to identify the stated reason and any missing evidence.
- Collect additional documentation—photos, contractor estimates, and maintenance records—that directly addresses the insurer’s concerns.
- File a formal appeal with a focused rebuttal and any new evidence.
- If the appeal fails or the denial is complex, hire a licensed public adjuster to build a professional dispute case.
- Consider legal counsel for large losses or when statutory remedies are required to enforce your policy rights.
Acting quickly preserves appeal rights and creates a chance to resolve disputes without litigation. The following sections explain how to structure appeals and when expert help becomes necessary.
How to Appeal a Denied Roof Claim Successfully
A successful appeal starts with a clear, evidence-based rebuttal to the insurer’s denial and new or previously omitted documentation that fills the gaps. Obtain the denial letter and, if possible, the claim file. Prepare a cover letter that addresses each denial point with supporting evidence—photos, contractor scopes, expert inspection reports, and maintenance records. Include a concise timeline and emphasize causation linking the covered event to the damage. If the insurer remains unresponsive or the appeal is technical, engage a licensed public adjuster who can re-evaluate the damage, compile an authoritative report, and negotiate on your behalf. Expert advocacy often turns paperwork into a persuasive technical argument insurers are more likely to accept.
When to Seek Expert Help for Denied Claims
Seek expert help when repair costs are substantial, damage patterns are complex, the insurer misclassifies cause, or the settlement offer is unacceptably low—these situations usually justify professional intervention. Triggers include significant structural issues, ignored secondary damage, and denials blaming pre-existing conditions where maintenance records can rebut the carrier. Hiring a public adjuster or attorney is particularly valuable when the insurer’s technical rationale needs reclassification or negotiations stall. Adjustering can help you decide whether to hire a public adjuster and connect you with licensed pros who specialize in contested roof claims.
Frequently Asked Questions
What steps should I take to document roof damage effectively?
Start with high-resolution, time-stamped photos and videos from multiple angles, showing both exterior and interior damage. Capture missing shingles, water stains, and structural issues, and keep a log of when and where you observed damage. Save maintenance records and receipts for temporary repairs—these items support your timeline and strengthen your claim.
How can I ensure my insurance policy covers roof damage?
Review your policy carefully—check coverage limits, exclusions, and the perils listed (storm, hail, fire, etc.). Pay attention to any maintenance or wear-and-tear clauses. If anything is unclear, ask your insurance agent. Keeping records of regular maintenance and repairs also helps show you didn’t neglect the roof, which can support a covered claim.
What should I do if my insurance adjuster undervalues my claim?
Collect additional evidence—detailed contractor estimates, clear photos, and any expert inspection reports—and ask the insurer for a re-evaluation. If the adjuster won’t revise the amount, consider hiring a licensed public adjuster to advocate for a fair settlement and handle negotiations on your behalf.
How long does the roof damage claims process typically take?
Claim timelines vary with damage complexity, insurer responsiveness, and documentation quality. Simple claims can resolve in a few weeks; complex or disputed claims may take several months. Filing promptly, providing thorough documentation, and staying in contact with your insurer help speed the process. If disputes arise, timelines can extend.
What are the benefits of hiring a public adjuster for my claim?
Public adjusters bring claims expertise, advocacy, and negotiation skills. They document damage, prepare detailed claim packages, and understand policy nuances that affect payouts. Their experience often results in higher settlements and less stress for homeowners handling complex losses.
Can I appeal a denied roof claim, and how?
Yes. Start by requesting the insurer’s denial letter to learn the reason, then gather any additional documentation that addresses the denial—photos, estimates, and maintenance records. Write a formal appeal that lays out your evidence and timeline. If needed, involve a public adjuster or attorney to strengthen your appeal and navigate the claims process.
